
Last updated: September 2026
This page contains affiliate links. If you buy through them, we may earn a commission at no extra cost to you. As an Amazon Associate I earn from qualifying purchases.
Organizing under the sink around pipes is less about pretty baskets and more about working with the plumbing you already have. Renters cannot relocate the trap, disposal, or supply lines—and the lease usually says no drilling into cabinet walls. This step-by-step playbook builds a deposit-safe, move-out ready under-sink system that clears the floor, protects particle board, and still leaves pipe access for leaks.
Constraints we optimize for: no drill · deposit-safe · pipes/disposal · small cabinets · move-out ready
Related: best under-sink organizers · L-shaped organizers around pipes · 2-tier pull-out organizers · under-sink storage without drilling · tension-rod method · under-sink mats.
Before you buy anything: 10-minute survey
- Empty the cabinet completely onto a towel.
- Wipe the floor dry. Feel for soft particle board—report active leaks before you cover them.
- Photograph the pipe layout (front and both side bays).
- Measure: cabinet width, depth, height to sink bowl, and the clear width of each side bay beside the trap/disposal.
- Note door hinges and any center stile.
- Decide zones: daily cleaners, backups, trash bags, water filter pitcher (if stored here).
Do not order a full-width pull-out until you know the disposal does not sit in the middle of the cabinet.
Step 1 — Protect the floor (mat first)
Particle board swells. A waterproof mat is the deposit-first move.
- Trim a waterproof liner to the cabinet footprint.
- Prefer a lipped mat when possible.
- Confirm doors still close.
Shop: WeatherTech SinkMat · waterproof under sink mat
Details: under-sink mats & liners for renters.
Step 2 — Map zones on the mat
Use painter’s tape to mark:
- Daily (dish soap, surface spray, sponges)
- Backup (refills, dishwasher pods)
- Awkward bulk (trash bags, vinegar jug)
Shared flats: add name labels on clear bins so products do not multiply.
Step 3 — Choose a freestanding shape that respects pipes
| Pipe layout | Best freestanding shape | Why |
|---|---|---|
| Center trap + open side bays | Twin caddies or L-shaped pair | Uses side real estate |
| Garbage disposal hogging space | L-shaped pull-outs / open expandable | Wraps the disposal |
| Tall clear height, narrow sides | 2-tier expandable shelf | Vertical without screws |
| Very wet / leak-prone history | Mat + minimal metal, more plastic bins | Easier wipe-downs |
Product deep dives:
- L-shaped under-sink organizers — verified: L-shaped 2-pack
- 2-tier pull-outs — verified: Seville expandable · Simple Houseware expandable
- Full roundup: best under-sink organizers
Step 4 — Lift sprays with a tension rod (optional but powerful)
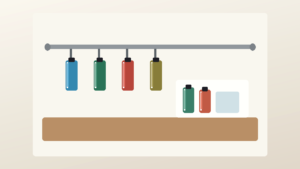
A spring tension rod across a side bay lifts spray bottles off the mat so the floor stays for bulk items.
- Measure bay width.
- Use a spring tension rod with rubber ends—not a screw-mount rod.
- Hang 3–5 bottles max on coated S-hooks.
- Keep bleach away from food-adjacent cloths; this cabinet is chemicals-only.
Shop: tension rod 40–70 cm · multi-pack tension rods · vinyl coated S-hooks
Method guide: tension-rod under-sink storage.
Step 5 — Add clear bins for the leftovers
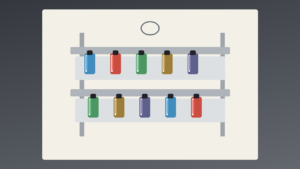
Odds and ends (gloves, spare sponges, dryer sheets if you insist) go in clear bins that pull forward—never in a mystery bag at the back.
Shop: clear under sink storage bins
Step 6 — Door storage only if the fit test passes
Over-door caddies are optional and often risky under sinks (moisture, hollow doors, chemical weight). If you try one, keep it light and padded. Prefer freestanding solutions first—see under-sink storage without drilling.
Step 7 — Leak drill and move-out readiness
- Know where the shutoff valves are—do not bury them behind immovable racks.
- Leave a clear path to the trap for the next plumber (or you).
- Keep the mat removable; do not silicone it down.
- Photograph the finished cabinet for your records.
- At move-out: empty, wipe, dry, pack organizers flat.
Full stack order (cheat sheet)
| Order | Item | Skip if… |
|---|---|---|
| 1 | Waterproof mat | Never skip |
| 2 | Zone tape | Optional after week one |
| 3 | L-shaped or expandable freestanding shelf | No side bay clearance |
| 4 | Tension rod + hooks | Bay too narrow / soft walls |
| 5 | Clear bins | Cabinet already calm |
| 6 | Door caddy | Door fails paint/clearance test |
Mistakes to skip
| Mistake | Fix |
|---|---|
| Buying organizers before measuring pipes | Photo + measure first |
| Covering a soft, wet floor | Fix leak, then mat |
| Screw-in cabinet rails | Freestanding only |
| Blocking shutoff valves | Keep valve access clear |
| Storing food under sink | Food belongs in pantry systems |
| Overloading tension rods | Cap at a few spray bottles |
FAQ
How do you organize under a sink with a garbage disposal?
Use L-shaped or open expandable shelves that leave the disposal column free. Twin side caddies also work. See L-shaped organizers.
Can I organize under the sink without drilling?
Yes—mat, freestanding shelves, bins, and spring tension rods cover most rentals. Guide: under-sink storage without drilling.
What goes under the sink vs in the pantry?
Chemicals, sponges, trash bags, and dishwasher supplies under the sink. Food never. Dry goods belong in pantry organization systems.
UK/AU: under-sink organisation around pipes?
Same steps—call it a cupboard under the sink. Measure trap clearance the same way.
How long does this take?
Survey + mat + one freestanding organizer: about 60–90 minutes including a store run if you already measured.
Soft CTA
Mat first, then one freestanding shape that matches your pipe photo—not a viral haul. For product picks, start with best under-sink organizers and the L-shaped pipe guide. For a wider no-drill kitchen checklist, continue to kitchen storage ideas for renters without drilling.
Sample layouts
Layout A — disposal center, two side bays
Mat → L-shaped organizer or twin pull-outs on sides → tension rod in the wider bay → bins for gloves.
Layout B — simple P-trap, tall cabinet
Mat → 2-tier expandable shelf straddling the trap opening → sprays on rod forward of the shelf → bulk jugs on the mat corners.
Layout C — micro cabinet (almost no sides)
Mat → one slim caddy only → hang nothing heavy → store backups in a hall closet if needed. Do not force a wide rack.
Verified expandable options: madesmart undersink shelf · Seville Classics.
Safety and lease notes
- Never store paint thinners with dish tools if fumes bother you—ventilate and separate.
- Keep child/pet interest items high or latched with freestanding locks that do not screw into cabinets (check lease).
- If you smell mildew after organizing, pull everything and dry—organisers do not fix moisture problems.