Last updated: September 2026
This page contains affiliate links. If you buy through them, we may earn a commission at no extra cost to you. As an Amazon Associate I earn from qualifying purchases.
Under-sink storage without drilling is the default setting for renters: the lease says no holes, the cabinet floor is particle board, and the plumbing already occupies the best real estate. You do not need a contractor kit—you need a deposit-safe, move-out ready stack that works around pipes.
This how-to is a no-drill playbook: mats, freestanding caddies, tension rods, bins, and door options that do not screw into landlord wood. Soft affiliate links appear where a product category helps; the system matters more than any single SKU.
Constraints we optimize for: no drill · deposit-safe · pipes/disposal · small cabinets · move-out ready
Related deep dives: best under-sink organizers, tension-rod method, under-sink mats.
The no-drill under-sink stack (in order)
| Step | What | Why first |
|---|---|---|
| 1 | Waterproof mat / liner | Protects the deposit from drips |
| 2 | Empty + zone | Daily cleaners vs backups vs trash bags |
| 3 | Freestanding caddy / L-shelf / 2-tier | Uses side bays around pipes |
| 4 | Tension rod + hooks | Lifts spray bottles off the floor |
| 5 | Clear bins (optional) | Shared flats and odd corners |
| 6 | Over-door / hang-on (optional, light only) | Only if door and lease allow |
Do not start with step 6. Pretty door racks will not save a wet, unmarked floor.
Step 1: Protect the cabinet (mat before organizers)
Particle board swells. A slow drip from a supply line can cost more than every organizer in this article.
- Empty the cabinet completely.
- Wipe the floor dry; feel for soft spots—report real leaks to the landlord before you cover them.
- Place a trim-to-fit waterproof mat with a lip if possible.
- Confirm doors still close.
Details and product fit: under-sink mats & liners for renters.
Shop category: waterproof under sink mat
Step 2: Map zones with painter’s tape
On the mat, tape three rectangles:
- Daily (dish soap, surface spray, sponges)
- Backup (refill bottles, extra pods)
- Bulk/awkward (trash bags, vinegar jug)
Zones stop the “everything in a milk crate” relapse. Shared flats: add a name label per roommate on clear bins.
Step 3: Freestanding organizers around pipes (no screws)
L-shaped or side-bay caddies
When a disposal owns the center, use L-shaped or single-side pull-outs so the pipe column stays empty. See the philosophy in our under-sink organizers hub.
Expandable 2-tier shelves
Expand to cabinet width, open a gap for the trap, keep heavy bottles on the bottom tier. No drill—just place.
Clear open bins
Best for odd leftover triangles of space. Prefer clear sides so you finish products instead of rebuying.
Rule: If installation instructions start with a drill bit, skip it for a rental.
Step 4: Tension rod lift (the $10 floor clearer)
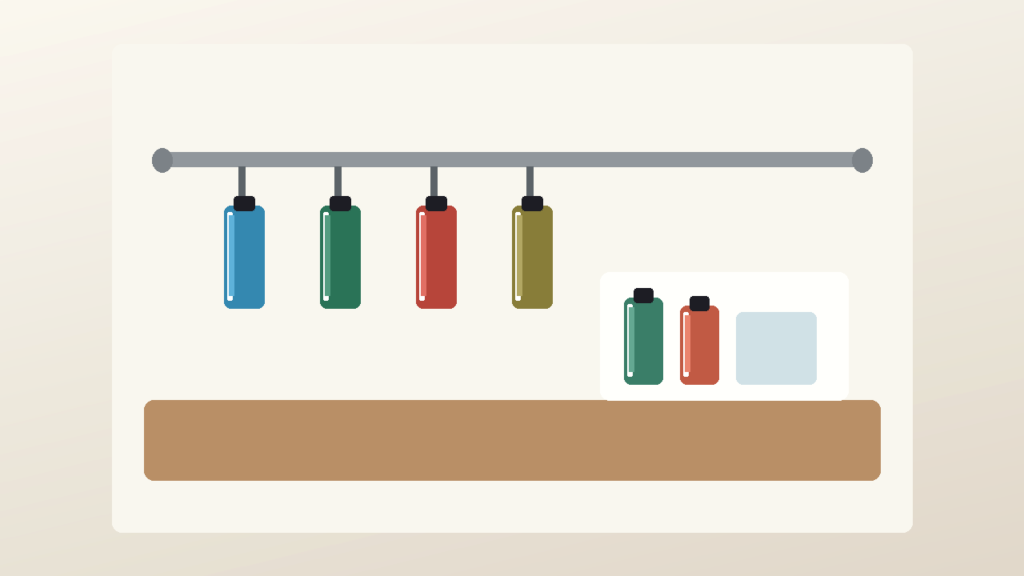
A spring tension rod across the cabinet hangs spray bottles by their triggers and frees the mat for soaps and bins.
How:
- Measure interior width at the height you want (usually mid-cabinet).
- Choose a rod that expands beyond that width.
- Seat on solid side walls—not crumbling edges.
- Hang only spray bottles within a sensible weight; do not hang gallon jugs.
Full walkthrough: tension-rod under-sink storage.
Shop category: spring tension rod under sink
Step 5: Door storage without drilling (use carefully)
Hang-on over-cabinet-door racks can hold brushes, gloves, or foil—light items only.
Check:
- Soft-close clearance
- Whether the rack scrapes paint
- Lease language about door hardware marks
If the door is hollow and flimsy, skip door storage. Freestanding beats a damaged door every time. For kitchen-door ideas elsewhere, see over-the-door kitchen storage.
Step 6: What not to do (deposit killers)
| Skip | Why | Do this instead |
|---|---|---|
| Screw-in pull-out kits | Holes in cabinet sides | Freestanding expandables / L-caddies |
| Heavy adhesive hooks on wet walls | Fail + residue | Tension rod or freestanding |
| Cardboard on the floor | Molds and stains | Waterproof mat |
| Stacking bottles on the trap | Stresses plumbing | Side bays only |
| Permanent contact paper you cannot peel | Move-out fights | Non-adhesive liner or mat |
45-minute no-drill reset checklist
- Photo the “before.”
- Empty; trash expired cleaners; recycle empties.
- Wipe; inspect for leaks.
- Install mat.
- Place freestanding caddy or 2-tier around pipes.
- Add tension rod for sprays.
- Label zones; load daily items in front.
- Photo the “after” for your move-out folder.
Pair with a broader weekend plan: weekend kitchen reset under $75.
Small-space variations
Studio / micro: Mat + tension rod + one clear caddy. Skip tall towers.
Galley with dishwasher beside sink: Measure door + pull-out clearance; shallow bins beat deep drawers.
Shared flat: Clear bins with names; one shared daily zone in front.
UK/AU cupboards: Same no-drill ideas—measure in centimetres; search “under sink storage without drilling” / “under sink storage no drill” with local spelling (organiser) as needed.
Tool-free shopping list (print this)
Bring measurements to the store or keep them in your phone notes:
- Interior width at mat height and at mid-cabinet (for a tension rod)
- Depth to the back wall
- Clear height under the basin
- Photo of pipes / disposal
Buy in this order unless something is already solved:
- Waterproof mat
- One freestanding caddy or expandable shelf
- Tension rod (if sprays are the pain)
- Two clear bins only if you still have orphaned corners
Resist gift-with-purchase organizers that need screws “for stability.” Stability in a rental comes from correct sizing, not from drilling landlord cabinets.
Aftercare: keeping a no-drill system working
- Wipe the mat when you see standing water—do not wait for swell.
- Retension the rod if seasons change and wood moves slightly.
- Recycle empty bottles the same day so zones do not silently refill.
- Before landlord visits, a 5-minute straighten beats a full re-org.
If you are preparing for move-out, reverse the stack: bins out → rod down → organizers out → mat up → wipe → photos.
FAQ
How can I add under sink storage without drilling?
Use a waterproof mat, freestanding L-caddies or expandable shelves, and a tension rod for sprays. That trio covers most rental cabinets without touching landlord wood.
Is adhesive under-sink storage safe for rentals?
Light adhesive can still stain paint or fail in humidity. Prefer freestanding and tension hardware. If you use adhesive, stick to low-weight, removable products and test a tiny spot first.
What if I have a garbage disposal?
Keep the center clear. Organize side bays with L-shaped caddies or an expandable shelf with a pipe gap. Hub guide: best under-sink organizers for renters.
Can I use Command hooks under the sink?
Sometimes for very light items on dry side walls—but under-sink humidity is harsh. A tension rod is usually more reliable for bottles. Weight-limit thinking: Command hooks kitchen guide.
Does under-sink storage without drilling work in older flats?
Yes—often more important in older particle-board cabinets. Mats and freestanding pieces reverse cleanly at move-out.
How do I keep the cabinet from smelling?
Finish open cleaners, wipe the mat monthly, do not store wet sponges in a closed bin, and fix drips at the source.